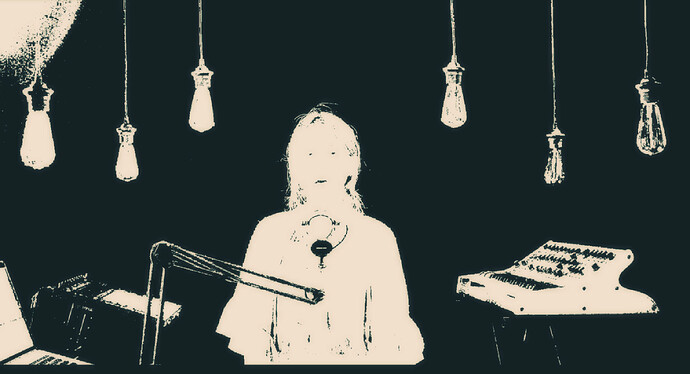
Hi,
I’m trying to create a mask that works in real time from camera input using color thresholding. And It has been very, very challenging so far.
Here’s the thing - I try to illuminate subjects as much as possible to isolate the background.
The background color of my studio is black. And you might not know it, but the hair color of East Asians like me, exactly Koreans, is very very dark, almost black.
You can change their clothes to brighter one, but it is quite difficult to dye all of them.
As you increase the power of lights or adjust the minimum point to fill the mask, then noise in the background increases as well.
So I made two layers and one adjusted the minimum point only to not exceed the outline visible from the camera input.
The other is to inflate the white part of the mask with blur, then subtract it to the point that it does not exceed the outline set in the first layer and then combine the two.
Thankfully, It was kind of successful when I tried it with still images but with videos, the noise looks unnatural sometimes it messes the edge.
Does anybody have any ideas to walk around it? Any good tools for shaping a mask? Or should I simply switch the background to green and key it out?
Any suggestions would be greatly appreciated.
Thank you.
Keying with a good keyer is probably the simplest option to get a good result. A different approach is to use a still of the background, and mix it with the live input using a difference blend mode and play around with feathering/blurring. Adding (blurred) edge detection on top of the base image to define edges can also be something to look at. An expanded possibility is to also use the difference method, but sending it through desaturation and posterize it, then blur to get an alpha mask. This will be increasingly computationally expensive, so delays might have to be taken into consideration. Delays and order of operations should be its own topic though.
By the looks of the provided image, the lighting doesn’t seem to be ideal for this type of shot. For something like this, I would have used side lighting either with fresnels with barndoors, or spot lights with knifes to cut out any spill on the backround. To make the hair contrast the background, I would also place a light of the floor behind the subject (uplight) that gives a contour around the subject, and also should light up any stray strands of hairs to make it look natural - or at least there. Side lights can be a bit hard/harsh though, especially when using different colors, so adding a front light in the front center at a steep angle could help transitioning/blending that effect.
Read more about lighting positions and the McCandless methods here: http://www.stagelightingprimer.com/index.html?slfs-angles.html&2
As you’ll want to have an as high contrast as possible to the background, the pendulums will combat that. If they are essential for the look, you could try a difference blend between a still of those and the background as well - I have never tried anything like that myself, but it probably won’t hurt to try it. If that is no dice, maybe blocking the light travelling backwards with aluminium foil could be a solution.
2 Likes
Ways to obtain background substitution changed a lot since a few years ago. I did it with background subtraction some years ago - you need to freeze a frame of the background without anyone in, then you do a pixel subtraction frame by frame. Nowadays best results are obtained through machine learning techniques. This works pretty well for a portrait pose like the one in your mask. One good tool that does it is Zoom - check its “background removal” function. Others are Snap Camera (and its tool Lens Studio that allows you to build the desired effect), and ChromaCam. All these allows you to put a custom image or video as background. At worse, you can put a green background, and do a greenscreen-like post step in Vuo. I think that some experimentation with these, joined with some Syphon, could work.
3 Likes
