Turning a composition into an FFGL (FreeFrame 1.6+) plugin for VJ apps such as Resolume, Magic Music Visuals, VDMX, and Isadora 3
Transcript
Hi, this is Jaymie from the Vuo team. In this tutorial, I’ll show you how to create an FFGL plugin from a Vuo composition and use it in Resolume Avenue.
FFGL plugins you create in Vuo will run in 64-bit macOS apps that support FFGL, also known as FreeFrame 1.5 — including the ones listed here.
There are three kinds of FFGL plugins you can create in Vuo. Sources generate content for a clip. Effects change how a clip looks. The third kind, blend modes, I won’t cover in this tutorial.
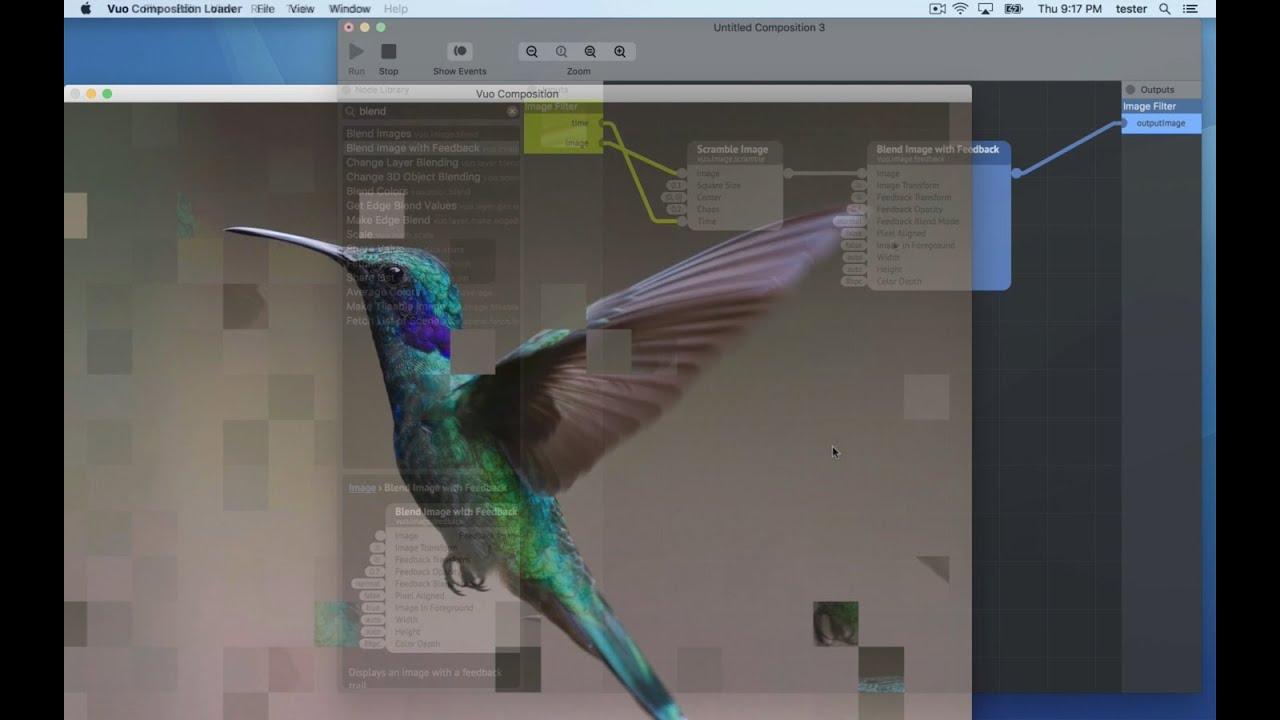
First we’ll go through how to create an effect. Go to File > New Composition from Template, and choose either Export > FFGL > Effect or Protocol > Image Filter.
I’ll speed through the process of creating the composition since it’s covered in other tutorials. The important thing is that you connect the published ports, which is how Avenue is going to talk to your composition.
Avenue is going to feed a series of images into the image port. It’s going to feed the number of seconds since the composition started running into the time port. Then your composition is going to alter the image and send it back to Avenue through the outputImage port. I’ve published a few extra input ports that will show up as parameters in Avenue.
Now go to File > Export > Mac FFGL Plugin. It’s creating the plugin and installing it in the standard location for FFGL plugins. Once that’s done, you need to relaunch Avenue.
If this is your first time using FFGL plugins in Avenue, you’ll need to tell it where to find the plugins. Go to Avenue > Preferences > Video, click the plus button, pick the hidden Library folder as a starting point, then select Graphics > FreeFrame Plug-Ins. You’ll need to restart Avenue.
Here’s the effect I just exported. Like other effects, you can drag it onto a clip, a layer, or the entire composition. You can adjust the parameters, including those extra published input ports I added.
So that’s how to create an effect. Now let’s build a source. Go to File > New Composition from Template and choose either Export > FFGL > Source or Protocol > Image Generator.
Again, I’ll skip through the process of building the composition. Remember, the published ports are key. The image generator protocol has time and outputImage published ports like an image filter. But instead of the input image, it has width and height, where Avenue is going to tell you the size of image it wants you to generate.
Now go to File > Export > Mac FFGL Plugin. And when that’s done, relaunch Avenue.
Here’s our source. Drag it onto a clip slot. As with effects, you can modify the parameters of the source.
One last thing I want to show you is how to get some pretty amazing ready-made graphics and turn them into FFGL plugins.
First method: ISF, the Interactive Shader Format by VIDVOX. Go to interactiveshaderformat.com and download one. In Vuo, go to Tools > Open User Modules Folder, and drop in your ISF file. Now here it is in your node library. Just build an image filter or generator composition around it and export to FFGL. After relaunching Avenue, here’s the ISF effect.
Second method: Shadertoy. Go to shadertoy.com and pick one you like. Most of them work in Vuo (although not all of the super complicated ones). In Vuo, put a Make Image with Shadertoy node into an image generator composition. Paste the Shadertoy code into the node’s input port. If there are any images in the iChannel slots, make sure you put those in your composition too. Then export to FFGL, relaunch Avenue, and you’ve got a Shadertoy source.
Now you know how to create FFGL plugins in Vuo. We’d love to see what you do with it. If you want to share your compositions or ask questions, go to vuo.org/community. Thanks for watching!
