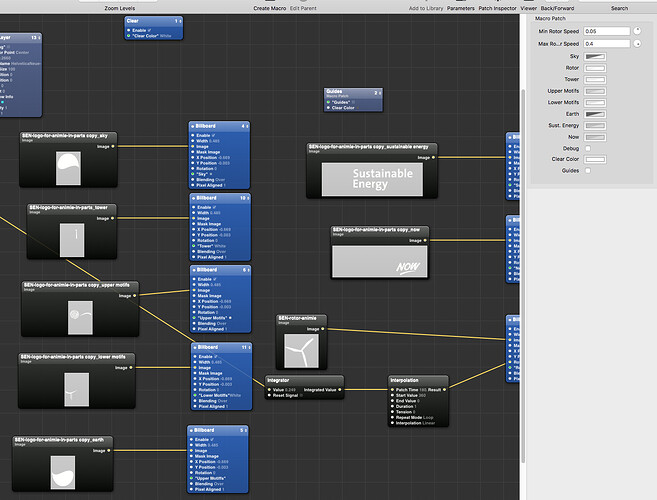
I have a really simple composition in QC that loads 8 images (.ai files which I have to export as .png files to use in Vuo) and have colour wells for all the images and I rotate one of the images according to a simple random generation algorithm. Vuo’s Make Image Layer node doesn’t have a colour input like the QC Billboard patch. Looking for something equivalent to sprite/billboard with colour tinting of image function.
What is the easiest way to apply colour to the images and added them all together to make the final image to export using the image protocol so I can make a movie file with motion blur? I have it working in QC but the motion blur in Quartz Crystal seems to be not working any more on my system (10.12.6). I don’t know if there’s a work around for Quartz Crystal so trying to remake in Vuo but I can see the easiest way to apply a seperate published colour value to each white image.
Here’s what it looks like in QC:
Reason I’m was doing with a program not in After Effects is I want a video bug to overlay on video recordings that will run for over an hour of it with rotations (with variable speed of rotation) of one the objects (A wind turbine in a logo) so I can render out 90 minutes in a short time and the rotations with be variable random speeds. If I knew how to write an expression in AE I’d do it that way with a Dynamic Link in Premier Pro (would probably have saved me hours!) but I started also making this as a layer for mimoLive for use in live streaming and recording of events.
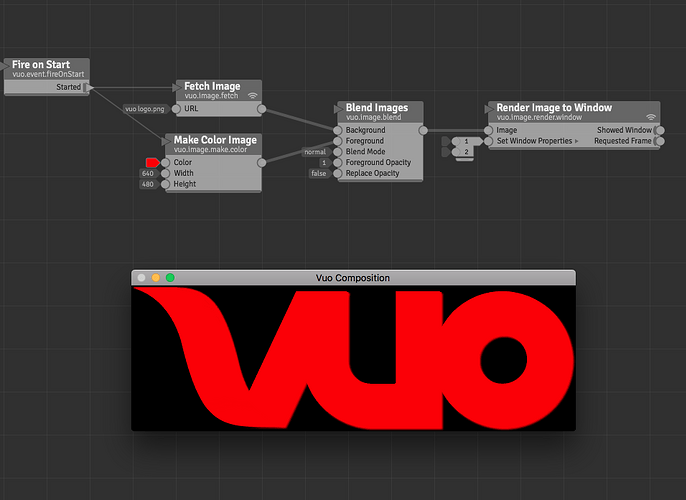
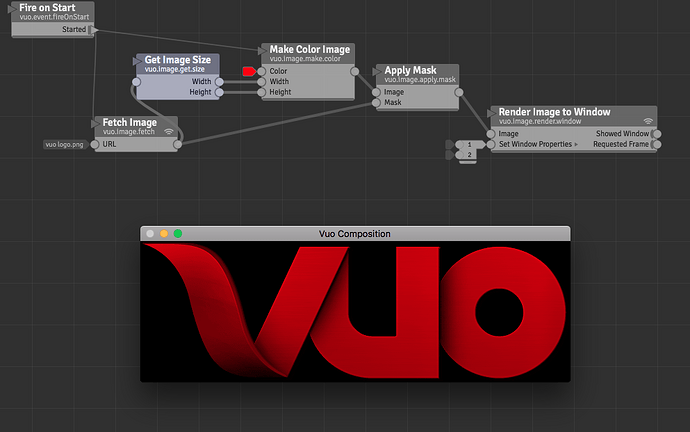
I was trying something similar to the first but I hadn’t noticed the Replace Opacity input until I saw iron your screenshot set to False. Now it’s working, thanks @Scratchpole. I like the second method better, didn’t think to use a mask, obvious now you show me!
2 Likes
I gave up on this because positioning each of the eight elements was taking about 5 minutes each and it did my head in. And if I find the last one doesn’t have room I have to move them all over again one by one. It’s just so frustrating, @teamVuo.
QC has dials for adjusting number inputs (which can be replaced with an Input Splitter with a set range if desired but not compelled to use). Vuo has decided to put range bars with a very small pixel range for adjusting these standard input values. As if nobody would ever care about any kind of precision.
Using the slider is impossible to get the accuracy I need. Using the up and down arrows are too big in the jumps. If there were some modifier keys for making the up and down arrows move in smaller and larger increments or if it was possible to adjust the standard increment in preferences there would be other ways to do this. As it is it’s insanely problematic and not the first time I’ve thought so and given up using Vuo for a project. I’m forced to manually keep trying numbers (trial and error) and unlike the standard macOS interface default that “enter” updates the number with the typed input but keeps the highlight on that input it “Tabs” to the next one. So I have to enter a number and then tab forward then “shift” + “tab” back to enter another number, over and over and over again. It’s a bit dispiriting for a designer trying to line up a few objects visually.
Most of my PNG file sizes are the same so I should be able to give them all the same position and they sit in place but that isn’t working for me either, and in any case sometimes you need quick and precise manual adjustments in visual design without the frustration of typing in 30 values until you get the right one.
In QC you can grab the adjustment dial for an input and drag the cursor away from the dial half a screen length and then get very tiny increments per 10 pixels of movement of the cursor, like a wretch with a very long arm. THere’s no way to do this in Vuo and this is not the first time I’ve given up using it for some UI frustration.
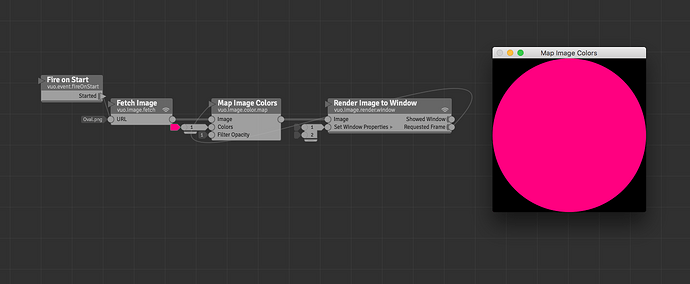
1 - Regarding tint image for a simple dual tone png you can also use Map Image Colors (see composition joined).
2 - Not sure I understand what you mean with “Color Wells” but since you mentioned “Published Colors” I guess you want to have control over the colors and change them over time ? Otherwise if not of course one would export only 1 image with all the elements from AI with the correct colors, and 1 extra image with the rotating propeller, and you’d have only 2 layers to place & 1 to rotate.
3 - “if it was possible to adjust the standard increment in preferences” would make a great feature request yes ! And a way to replace sliders (right click on port ?) with wheels too (I know what you mean giving a long arm for a more precise adjustment).
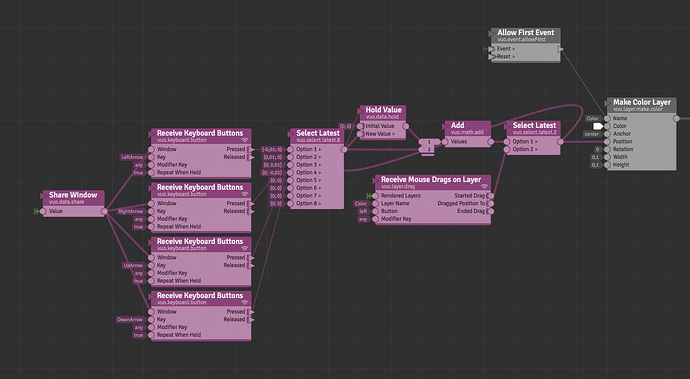
4 - If you want to manually place a layer either with mouse drags or custom arrow keys increments, copy & paste the magenta nodes from the joined “Move Layer” composition, connect them as shown, give your layers some name and adjust them (don’t forget to change the corresponding layer name on the “Receive Mouse Drags on Layer” node (this will be easier in Vuo 2) & connect the “fire on start” or “allow first event” to the layers themselves as shown).
When all placed, remove all the magenta nodes and your layers are placed and if the composition is running when deleting, all the values will be saved & stored.
Alastair Question 1.1.zip (11.2 KB)
3 Likes
Joining a composition where you can simply connect the magenta “Select Latest” Output to the Position port of any layer to arrow-move it with custom increments (or add layer name for mouse drag). Disconnect cable to lock position.
When done, remove magenta nodes & turn composition into image generator mode for movie export.
PS : you can also group sub-elements together into combine layers and the whole group together in case you wanna move the whole block later.
Move Elements.zip (80.5 KB)
2 Likes
Thanks @Bodysoulspirit for the helper compositions. Now you mention it I made something a bit like this in Quartz Composer once to help with aligning hit-zone for buttons into a JS patch data store! I was up really late last night and I wasn’t thinking laterally at all by then (not in Vuo, I was also trying things in AI, Kineme QCrystal, mimoLive rendering to ProRes4444, AE and PremPro), and as you can read I got increasingly trusted with the stock tools for adjusting port values. B/c I’m still pretty novice at using Vuo I haven’t thought through all the helper tools we need to do graphic designer type work in Vuo, I had loads of such tools for QC after a few years of regular use. Maybe some of us could compile a set of these user made helper tools and Vuo could place on the site in a reserved place for Editor additions or something?
—> 2. I was originally building it in QC partly so I could use it in mimLive (formerly BonixTV) as a custom layer as well as generate some footage to overly in Premier Pro right now for a past event. mimoLive allows you to record input settings as Layer variants. (It will be neat if we can find a way to wrap Vuo comps in QC wrappers to use in mimoLive, via Syphon is the most obvious but hacky way). So I had each element as an adjustable colour so I could have different (editable) versions storage in mimoLive i.e. a colour version, and a few greyscale and a translucent white variation. When working with transference it depends on the footage the bug is over so it needs to be flexible on the job. I just continued with that approach, yes I could have used just the two images, but I was repeating my workflow from QC/mimoLive. And when Vuo can export Image generators for Motion and FCP X it will work for those two I guess I was thinking.
–> 1. Thanks for the Map Image node, I was looking at a couple of other nodes in Vuo’s long list of image adjustment layer choices but couldn’t get anything to work, I must have missed that one, I guess it’s the most ideal one yet (and small on screen space too!).
2 Likes
A workaround for the slider range is to publish the port and then right click on it and edit details (also sets default increment size). Also for easier placement, add a layer under the images you want to place and then use that as a guide to place them on the canvas. An additional way to attack it is to snap guides to the center of a selected layer in AI(? I just use Phototshop, but I’d guess you get the same info in AI?) then observe and note down where the center point of the layer is. Then it should just be a matter of typing in the coordinates.
2 Likes
thanks @MartinusMagneson! I must have another shot at Vuo soon.
