Building 3D graphics
Transcript
Now I want to revisit the setup from the very beginning of this talk, where we used yet another approach to set up motion and add effects.
Instead of bringing in motion from videos or audio graphs, we’re now going to generate it entirely in Vuo. Compared to video mixers or audio graphs, this setup is more of a challenge to build because you have to design all the motion yourself. I like this setup, though, because I think it’s the most effective at establishing an overarching theme and continuity.
With a video mixer, there’s kind of a mental jolt when you switch from one video to another, like changing scenes in a TV show, which can be really effective if you time it right, but that’s not always what you want. Whereas a video mixer takes the audience through a series of scenes, graphics built entirely in Vuo can let the audience explore different perspectives and variations on the same scene. This is really effective for a piece of music that’s tied together with an overarching theme, so it makes the visuals match that.
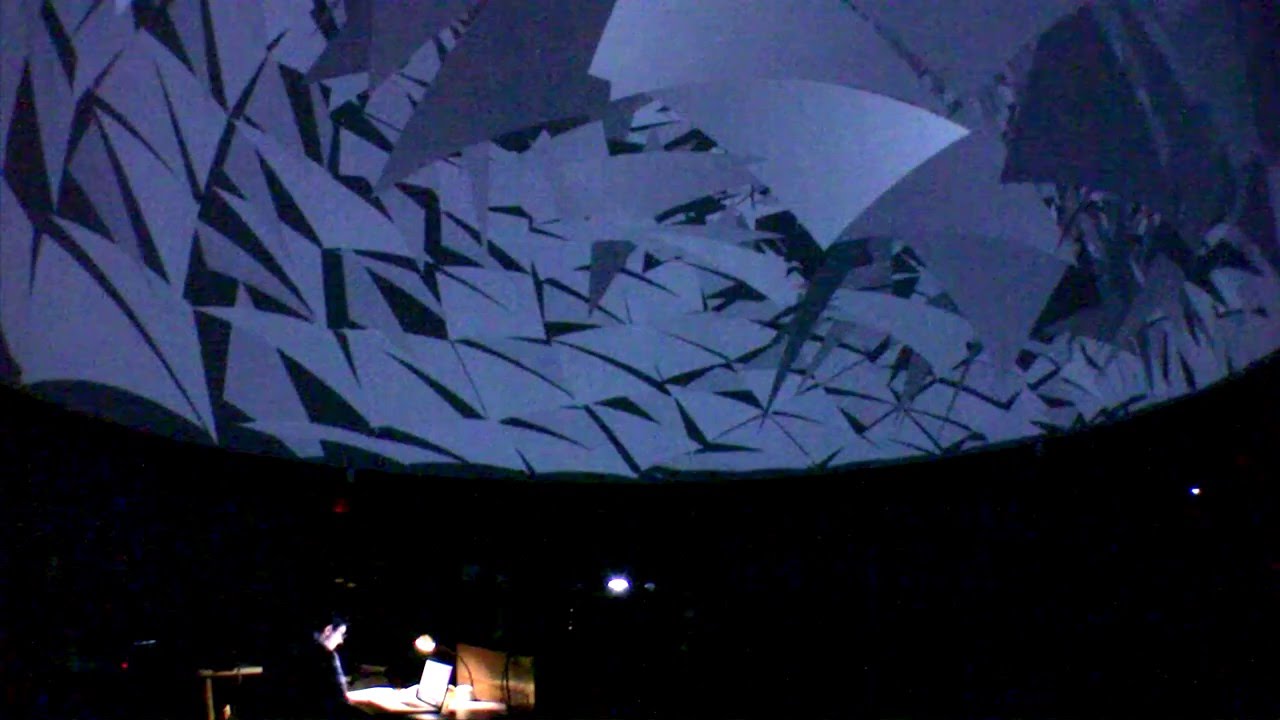
Here’s a recap of the visuals we demoed at the beginning of this talk. Remember that they’re being cued by MIDI messages from Renoise and the Behringer.
Let’s build something like this in Vuo. We are at the intimidating part, where you have pretty much a blank slate and you have to figure out where to start. The trick is to build up your composition from simple pieces and let the complexity emerge from how the simple pieces interact with each other and how they’re repeated. Computers are really good at taking simple rules and extrapolating something super complex from them by performing millions of calculations per second, so we’re gonna think simple and let the computer do the heavy lifting.
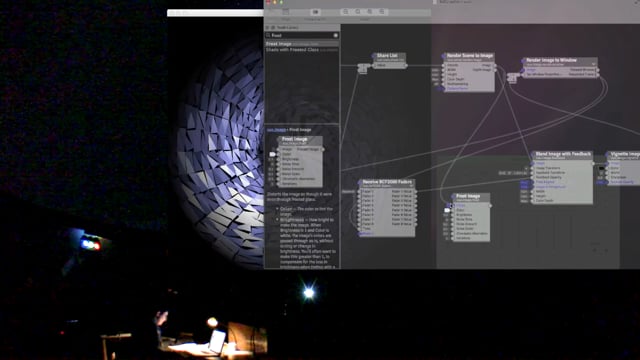
One way of getting complexity out of something simple is through repetition across space — having many copies of the same basic shape with small variations. You can do that by taking a small shape and making copies of it. Or I think it’s fun to start with a big shape and shatter it into similar-looking small pieces. In Vuo, we’ll do that by starting with a sphere as our big shape and exploding it out a bit.
Now our output is a rectangle. With the video mixer and audio graphs, we were able to just vignette the output since we didn’t really care about it getting warped. But now that we have a 3D scene, the warping would be more obvious. If this were a real physical scene and we were filming it, what would we do to get it on a dome? We’d use a camera with a fisheye lens to make it map. Since this is a virtual scene, we’re gonna use a virtual fisheye camera. We added a Make Targeted Fisheye Camera node and then we added that camera to our scene.
Instead of having our sphere sitting right there in the middle — my art teacher always said “don’t do that!” — it would be nice to have it actually fill up the screen. So let’s actually sit ourselves inside the sphere. How do we do that? We could either move the sphere toward the virtual camera that’s looking at the scene, or we could move the camera into the sphere. Let’s move the camera. We’ll put it in the center of the sphere, and we’ll have it looking downward, since the base of the sphere has this nice circle pattern.
So far, our visuals are just standing still. Let’s put in some motion — remember, motion is really important for music visuals. It doesn’t have to be fancy. We can just do a slow rotation — we’re gonna make the exploded sphere rotate at 1 degree per second. On the planetarium dome, you want to be careful not to put in too heavy motion, unless you wanna be mean, because people can get motion sick. We are transforming this, making it rotate around the Y axis, which is the up-and-down axis. Remember, we’re looking at the bottom of the sphere. Now we have some motion.
One trick we sometimes use when making visuals with MIDI input is to invent characters who represent the different motifs in the music. Do you know “Peter and the Wolf”, have you heard of that? There are little tunes that each represent a different animal, like [humming Peter’s theme] for Peter. Our characters and motifs are usually a bit more abstract than that, like a ball that bounces to a bass drum beat or a waterfall that appears while hi-hats are playing.
What we could do for this piece is invent a character that’s an invisible fist that punches the sphere in toward us, to go with the snare drum. We can implement the fist by using the Pinch 3D Object node — this node right here. “Pinch” simulates gravity pulling an object in toward a point, or if you negate it like we’re doing, it’s anti-gravity pushing an object away from a point. I’ve added a Fire on Start node here to demo the effect. What we’d really to is add Receive MIDI Notes as I showed near the beginning of this talk, so that it could be triggered by the snare drum.
Characters are good for going with notes and instruments. For musical effects that modify the sound of the notes, we can add visual effects that modify the imagery. In case you’re wondering, I tend to think of a character as something that takes up space in the scene — even if it is an invisible fist — and an effect as something that modifies the character or the entire scene.
We showed earlier how turning up a certain fader on the Behringer would tell Renoise to turn up the vibrato on certain instruments and simultaneously tell Vuo to add a wobbly visual effect. In the same way, we could use another fader both to lower the pitch of the drums and to add an image echoey effect called feedback. As a first step to that, we’ll render the 3D scene to an image so we can add image feedback to it.
Now we will use the Receive BCF2000 Faders node to capture the MIDI messages coming in from the Behringer fader and we’re gonna convert those into numbers, that we can feed into the Blend Image with Feedback node to control the amount of feedback or echoyness in the image. We’re setting up our fader to control the amount of feedback, and we’re setting up a cable to drive the faders. And now we have some feedback. Notice that rendering it to an image changed our output back to a rectangle, so we’d have to vignette it once again to restrict it to the dome.
A little while ago I said that it’s good to build up your visuals from simple parts and let the complexity emerge from the millions of computations done by the computer. Image feedback is a great example of that, because you define simple rules for it with the input parameters, and through repetition in time and space the computer turns that into something complex and often beautiful.
Another way to add complexity is by compounding one effect on another, which often gives second-order effects where the composition starts to kinda take on a life of its own. So for our second effect, we’ll add my #1 favorite node, which is Frost Image. Frost Image is nice because it generates such complex and varied effects that it fits lots of different music and you can keep reusing it without repeating yourself. Let’s see that on the dome one more time.
From here we could add more characters and effects to make the visuals more interesting and more responsive to the music. One trick that Steve and I like to use to keep the visuals interesting throughout a piece is to start out with just one or two effects and gradually introduce more as the piece progresses, instead of dumping them all out there at the beginning. It’s good to pace yourself, because if you have too many effects or they’re changing too fast, it can actually distract from the music. Another trick we use is to vary intensity of the visuals — the amount of light, motion, and/or color — in response to the music becoming less or more intense. You can learn lots of tricks just from practicing visuals and watching other people.
So, to sum up, we demo’ed several ways of making music visuals with Vuo — a video mixer, audio graphs, and 3D graphics, driven by the Behringer as a MIDI controller and Renoise as a MIDI sequencer.
I hope that we have sparked your interest in making music visuals and maybe you’ll try making some yourself. If you want to make them with Vuo, I hope we’ve showed you enough tonight that you’ll feel comfortable getting started. Our website is http://vuo.org/ .
In any case, I hope some of the stuff I’ve talked about will help you better understand and appreciate the various music and visuals performances tonight. Alright, thanks for listening!

