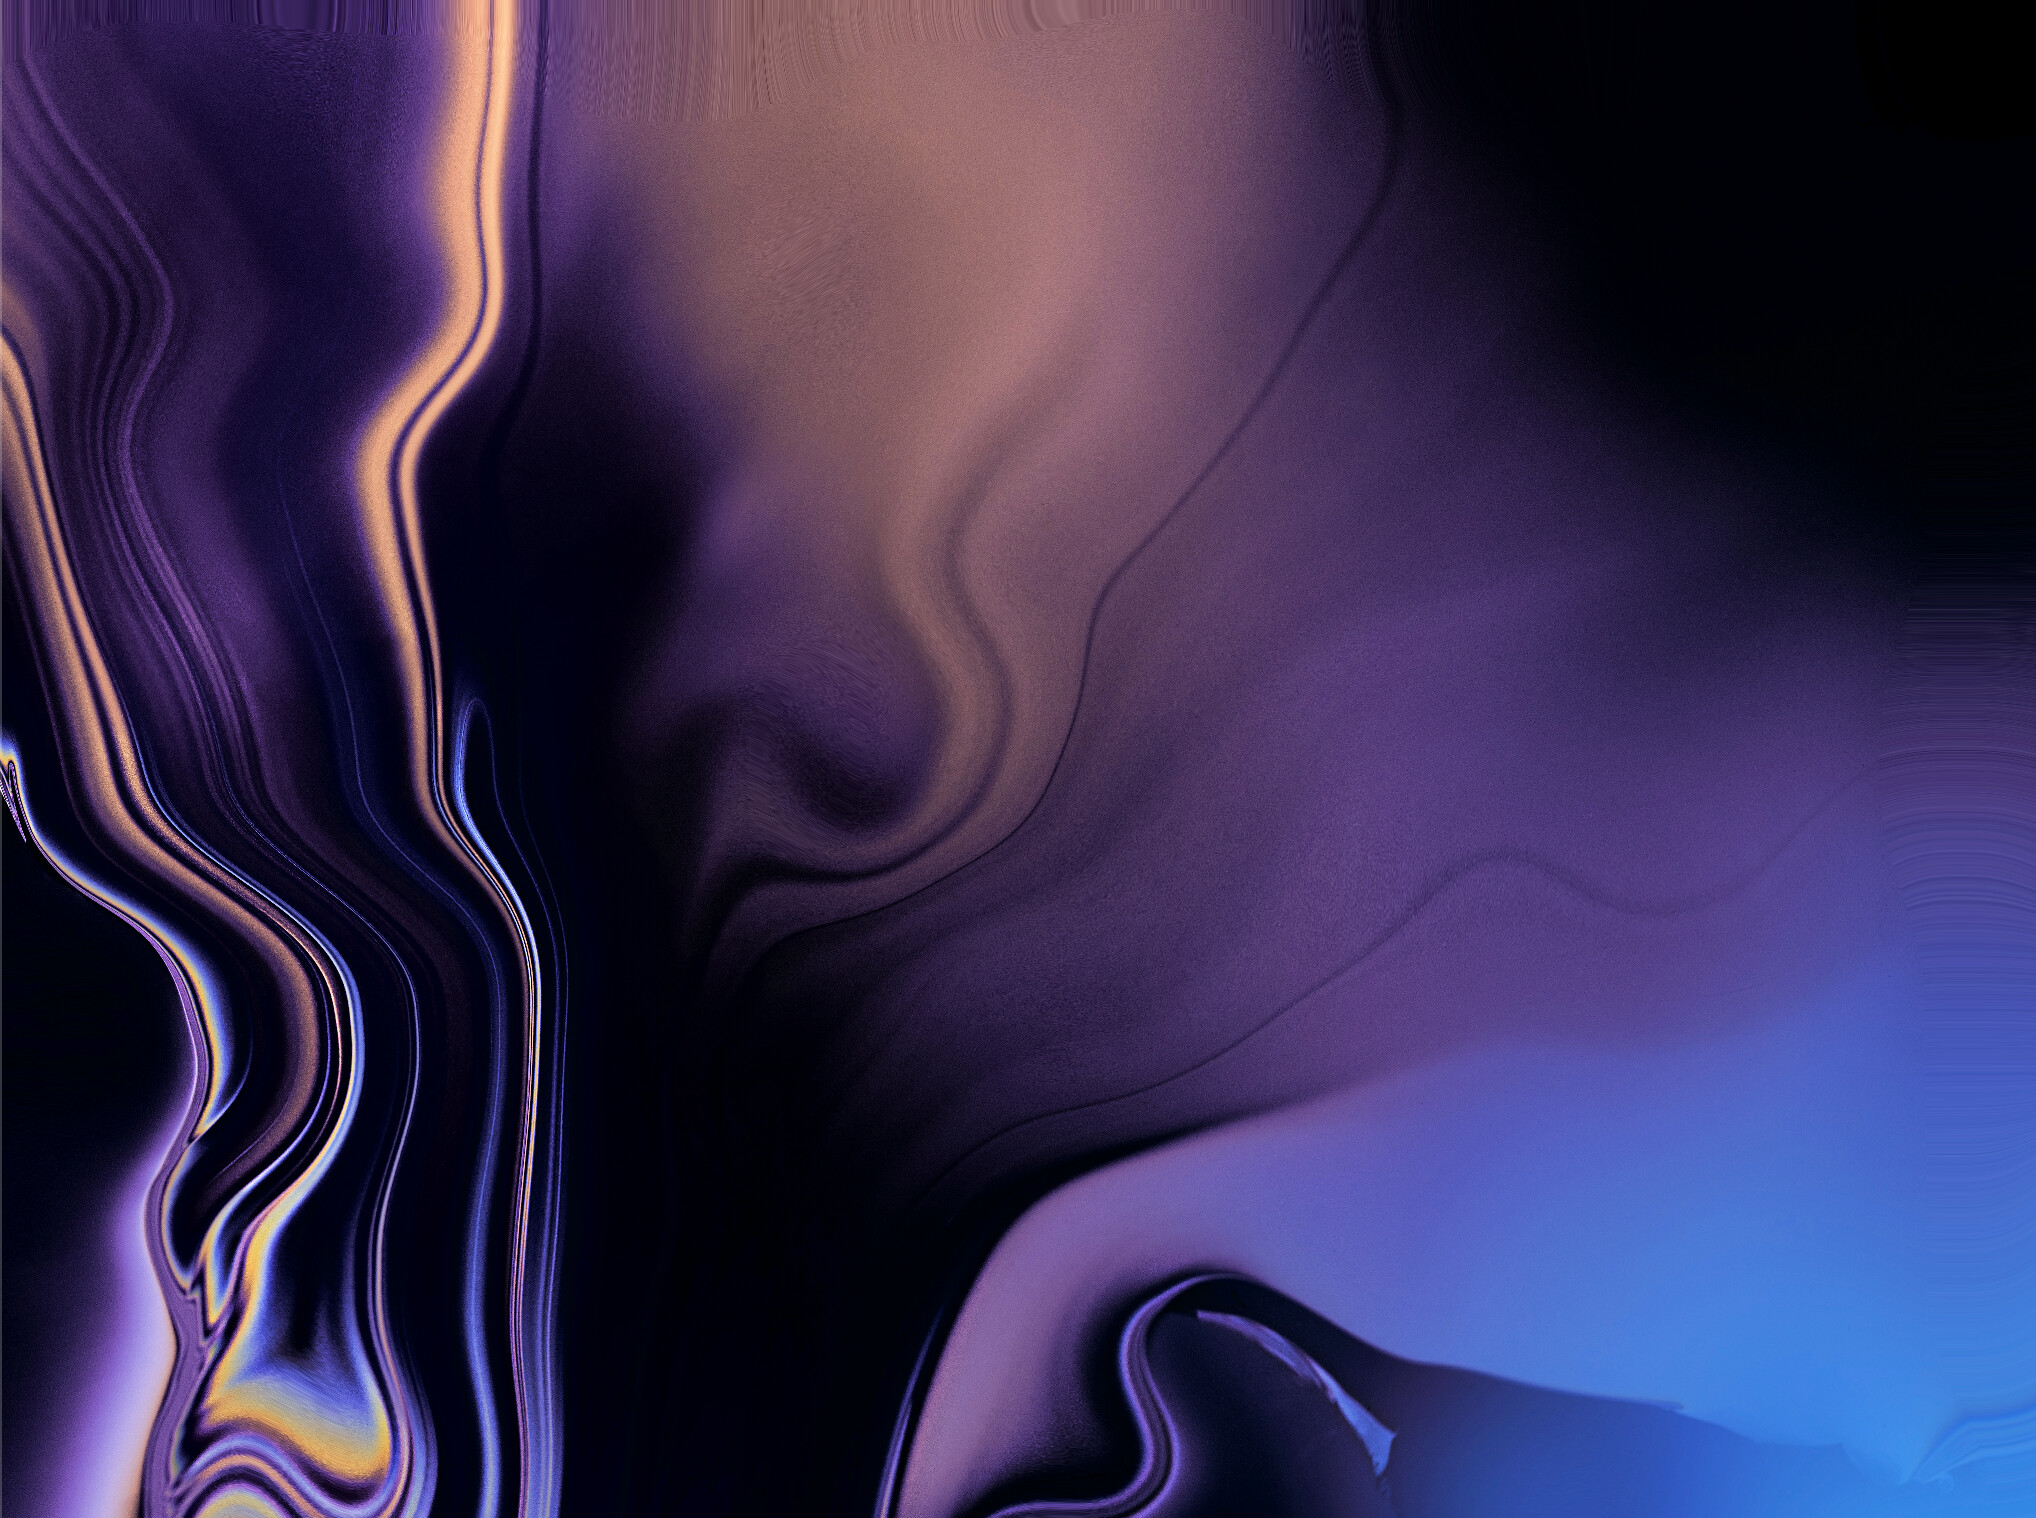
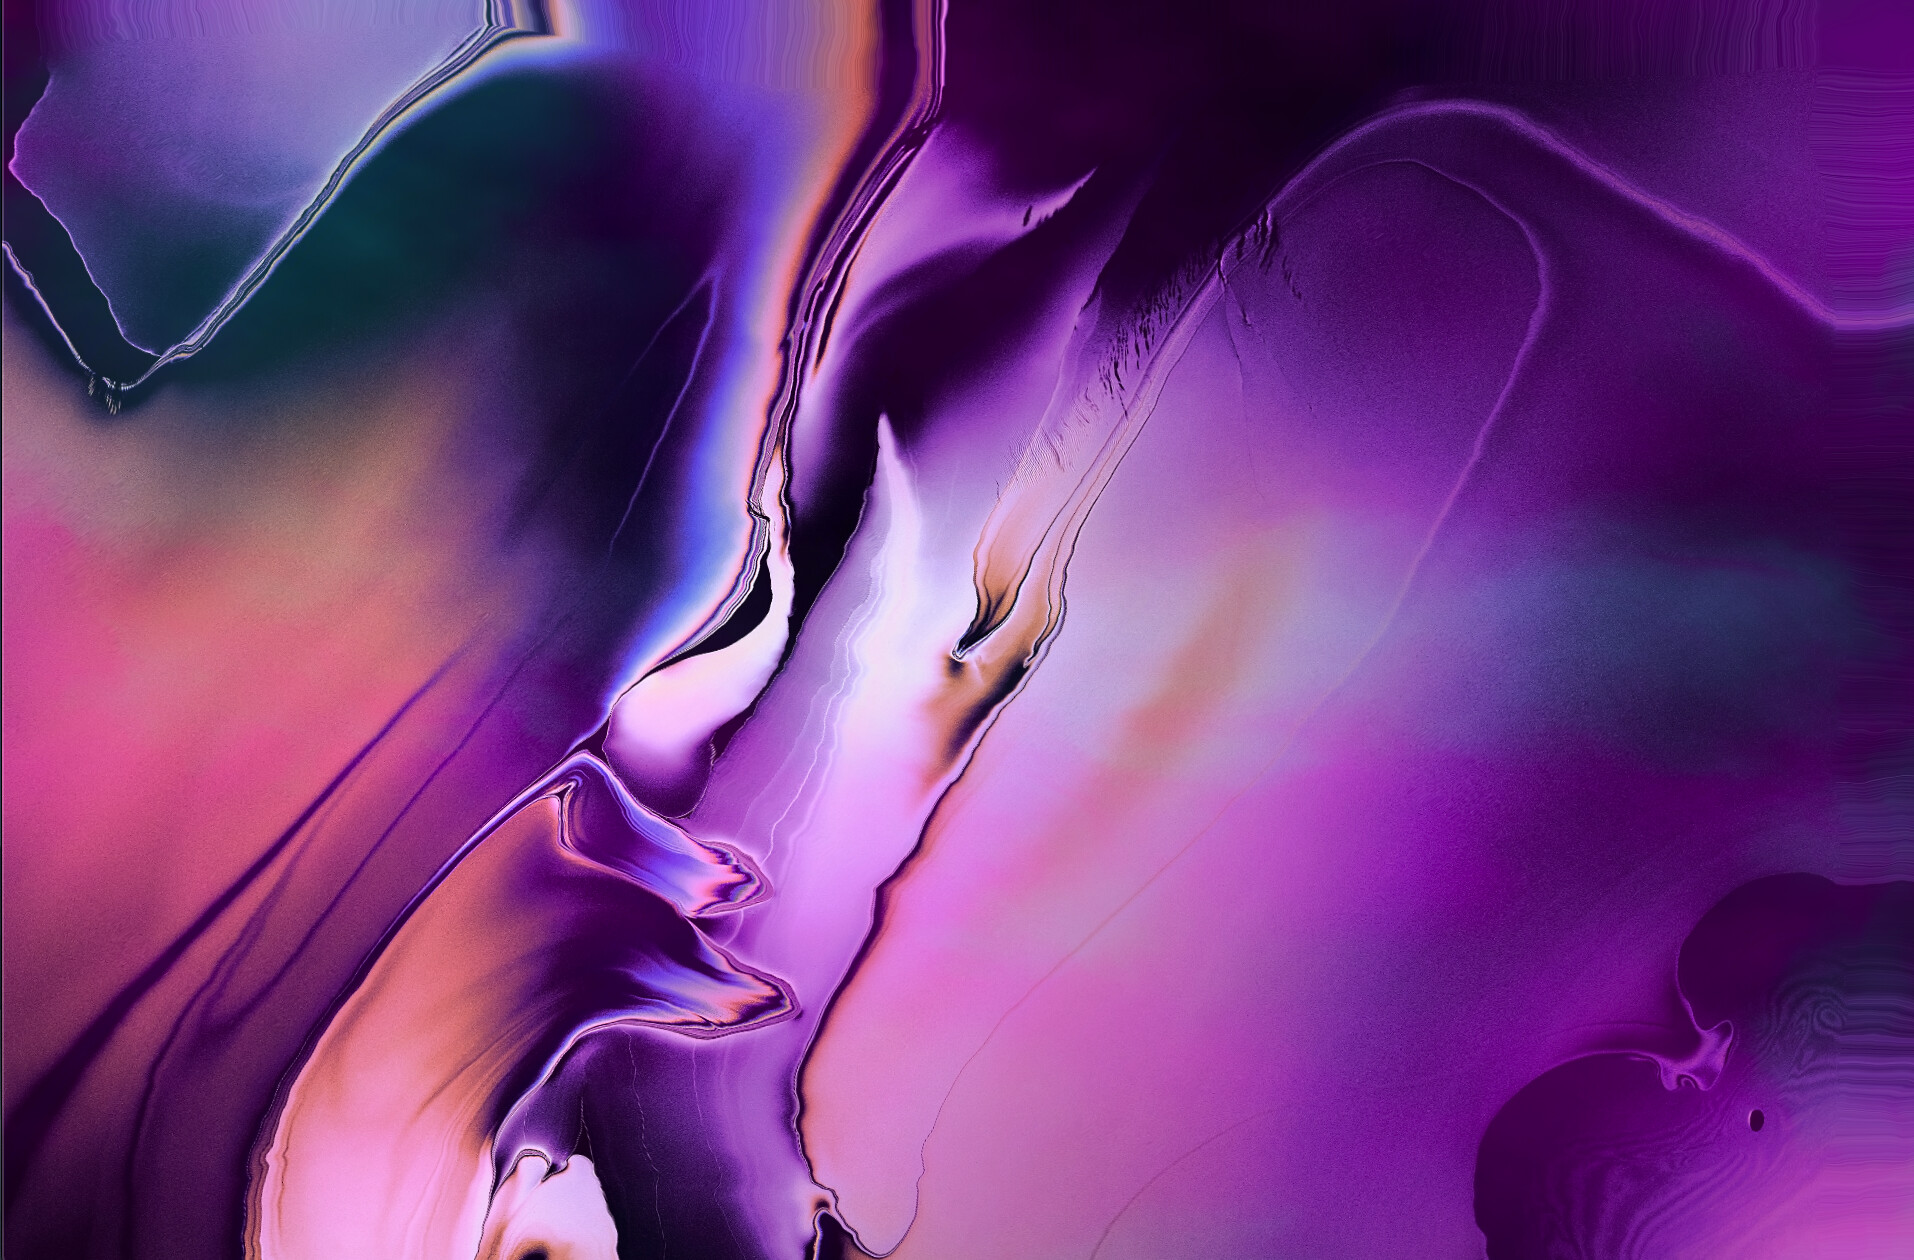
Here is an underwater desktop GLSL shader node I made with Fractal Brownian Motion ( FBM ). you have control of Gain, Amplitude, Lacunarity, and amount of Octaves the noise has. Depending on these settings will change how the waves look.
This looks cool with the Abstract 1 desktop from your library but you can change it to any image or video etc… There used to be a desktop image of rocks that looked particularly cool when underwater. Sadly this desktop image is no longer included in osx. Find one that looks good for you.
Hopefully in the future Vuo will support sending window levels to the desktop so you could actually send this animated to your desktop under the icons. For now it could make a cool screen saver etc…
you will have to edit the colors RGB channels by hand. if you want to change them. for some reason I can’t add multiple color input ports to an image generator. it might be bug ? you can find some good information on fbm shaders and how they are used in the last chapter of the book of shaders.
here is an updated version. I got color inputs to work. I think the file I posted previous was corrupt and not sure if it worked or not. I messed with the color blue channels a bit.
Nice. Had a thought that this might be super cool to see as an image filter, to input an image (texture) and turn it into clouds (or water). How straightforward would that be (especially to have an “amount” parameter that could dissolve the image)?
well the under water desktop uses the fbm noise to offset the uv texture coordinates of the image. that’s what makes the image look like its underwater. I did try and mix the cloud noise with the water image. you can see what this looks like if you uncomment the last line in the underwater shader code and then save the shader.
//gl_FragColor = vec4((f * f * f + 0.5 * f * f + 0.5 * f ) * color.rgb,1.);
the image is assigned to the color variable and its uv coordinates are offset by the variable f in a 2d vector. then using this f noise in one dimension to create the final color makes the noise and water image mix by multiplying them. you see that in the last line of code I commented out. it was left in there more to debug. I didn’t like the clouds mixed with water but I’m sure there are images that could be used to make it look cool.
alternatively it might look cool to use an image as the base color of the clouds or use two images and then the noise to mix them together. that might look cool depending on the input images. that would look similar to uncommenting that last line but the clouds would be a mix of the image colors and the color chosen to mix with or the colors of two images mixed with noise.
i’m not sure how much of the image will show if its the base color though because in the colors shader the colors are being mixed 3 times with different offset percentages in each color mix. this plus that last line of code gives the final more depth and also more cloud variations as they are being mixed three times by different fbm offsets.
I suppose adding the image to the final color mix would show more of it, then if adding it to the base color. also adding an amount input and assigning that to the images alpha channel could blend it in and out. I would actually have to change the colors mixers around as they are vec3 without alpha but definitely doable as Vuo colors have the alpha channel so I wouldn’t need to change much. ill try it and see what it looks like.
jersmi I implemented what you asked for. I added an image input to the image generator and Vuo automatically converted it to image filter. what this means is that it will no longer work as an image generator and requires an image input to render. so even if using just the clouds color mixer modes you still got to keep an image on the input.
I put an amount variable in so you can mix from water/clouds image to just colors. this wasn’t as simple as adding an amount to an alpha channel. apparently alpha on images is only 1.0 or 0.0 and not a blend. like 0.5 alpha still displays as 1.0. so this didn’t work how I thought for blending.
so instead of changing the images alpha I just blended back in the unused colors. I assigned the inputColor3 and inputColor4 as the water image when amount is set to 1.0 and when you change the amount down to 0.0 it will blend the inputColors back in fading the image out.
Awesome! I totally appreciate you running with this.
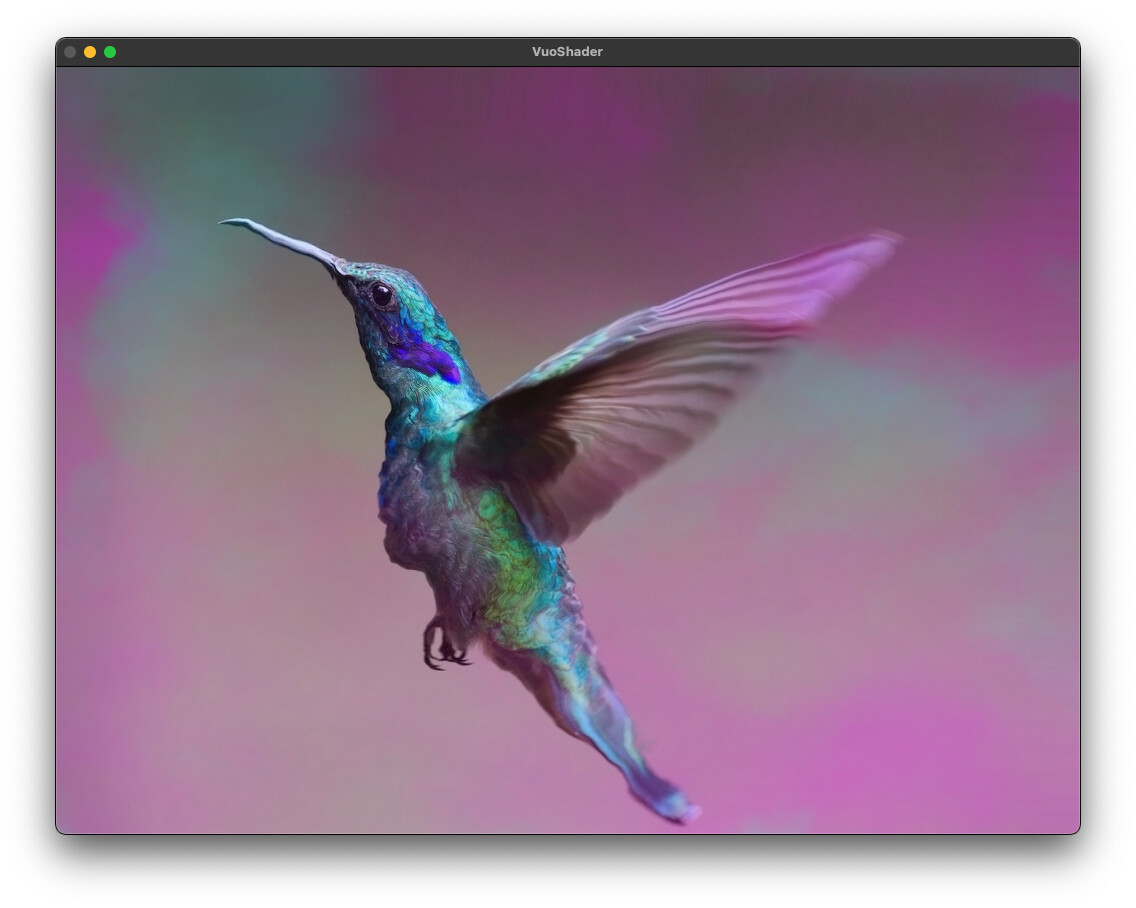
By the way, for me with no image connected, the shader will “default” to the hummingbird image. The image distorts with clouds “passing by”.
Looks like the amount of distortion is “locked in”, and I can futz around and get different color combinations if, say, I break the amount variable into two variables that effect the iColors separately, change the (new) amounts to be out of 0 to 1 range, etc. Does that sound about right?.. Be nice to also be able to change the amount of distortion to the image, I can play around with that.
Oh wait – sorry, I see how amplitude/gain/lacunarity/octaves effect the image, got it. Actually quite convincing realistic clouds if I use gray scale + sky colors. There’s the relationship of fbm with nature, I suppose.
Edit: Would be good to have coords centered for image distortion…
well when you run the composition in the shader editor the humming bird will show up but when using the shader in a composition it will render black if no image is attached. I haven’t figured out how to get the humming bird to pop up. it seems to pop up when I have the shader installed in the modules folder. when you go to build a image filter shader Vuo asks to drag and drop an image, which I don’t like. I like the humming bird better because that way I don’t have to drag and drop an image every time I run the shader.
changing the amount to be out of the 0 to 1 range won’t work. you could break up the amount but you would need to make three of them because its used to fade the image to colors in two spots and also a third fade at the end to blend in cloud shadows which are not used when there is an image. normally the mix function is used with a clamped value of 0 to 1 for percentage of mix so making the amount go to 2 wouldn’t do anything. it would just act like the mix was set to 1.0 or that’s my guess.
if you want to change the amount of distortion the image has or make it look more watery you can change the fbm frequency by messing with gain and amplitude. if this is not enough you can also change the multiplier on the images uv. so changing the 0.1 in this line of code to be something bigger.
this multiplier is to keep the uv coordinates inside the 0 to 1 range or close to it. with a number too big it will rip a hole in the image or make the fragcoords not normalized anymore. notice i’m using isf_FragNormCoord.xy instead of the uv and or st coordinates the noise uses.
st is what the book of shaders uses and those coordinates are multiplied by 3 times so they can’t be used with the image because they are out of the normalized range. the clamp function is used in the color mixing to keep the them in range. for what ever reason the noise works better when feeding a larger range of uv coords.
alternatively you could mess with the + vec2(f,f) and make it + vec2(f*f, f*f)*distortion or something like that. just try with distortion first. anything bigger than 0.7 the image will start to get holes but they are holes with modulated noise so they can look cool with the clouds. you can experiment if you like.
I like this filter with the abstract images from library desktop pictures. its good we pushed this a little farther i’m happier with the results using some clouds with watery image.
indeed there is a relationship with fbm and nature I would say. at least it does make for a convincing landscape or terrain map if you know what you are doing. fbm is how all those convincing shader toy terrain maps are made by using it to displace. I’m not entirely there yet I just learned shader displacement the other day or well I have been using shader displacement maps for years. i’m talking about displacing with a ray marched distance field is something I’m just dabbling with. the last chapter of the book of shaders has some other variations of fbm like fbm ridges that make for a more convincing mountain like terrain as opposed to using clouds for displacement.
I get all you are saying, finding those parameters as well.
Regarding the “amount” beyond 0 to 1 – doesn’t break anything here since amount is effecting color, just amounts to weird colors/alphas/inversions, etc. Best practices is probably to keep color within 0 to 1 range. (Let know if it is actually a bad idea, I tend to experiment with these notions).
One question. You see how upping the gain pushes the image to the bottom left? How can I get it to “disintegrate” from the center out?
indeed in general when working with colors its best to keep them in 0 to 1 range or at least that’s how things are supposed to be but sometimes its fun to push things.
the gain acts differently on images than it does the clouds. the gain will wash the clouds out as it approaches 1.0 and with the image it pushes it down to the left as it approaches 1.0. so to keep it in the middle you could offset the uv coordinates offset in the x axis if that makes sense. you could use the gain itself to do this offset of the offset by multiplying its negative by the f.x variable in the color image.
this will keep the image in the middle when you increase the gain up until it approaches 1.0 after 1.0 it will start to push the image down to the right because we are using negative value. that is if you want to experiment with things out of range. you would have to edit the gain input details and set its max to 2.0 if you want to do this because its set to 1.0 right now. it seems to work best for both images or clouds when the gain is set to 0.5.
( edit ) I just noticed when looking at the humming bird that you would also want to offset the y axis to keep the bird in the middle. so this code should keep the image more centered. it also cancels out movement for anything 0.5 and below so you would want to bump the gain up to 0.6 to see movement again.