Creating a composition using a feedback loop
Transcript
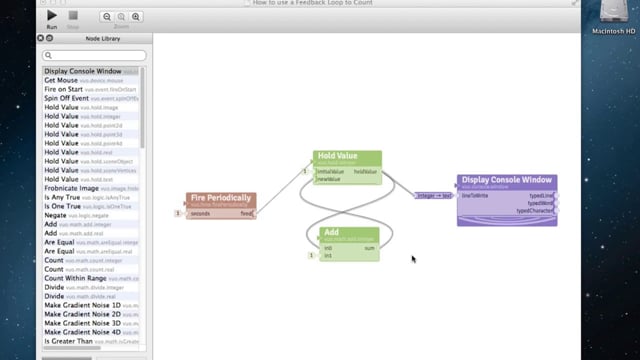
Hey there, thanks for checking out Vuo. I’m Travis; in this tutorial we’ll create a composition that utilizes a feedback loop in order to count upward. This is our composition in complete form (all nodes linked together), and this is our feedback loop (between Hold Value node and Add node). First we’ll run this composition and get a visual for what it creates, we’ll walk through what some of the nodes perform in the composition, then we’ll delete it and build the composition together, step by step. So let’s go ahead and run it (click “Run” button).
It (the composition) creates a blank white window, then every one second it counts upon it. It prints a number, going incrementally up in the count. This node (Fire Periodically) is responsible for timing; it tells the other nodes when it’s time to perform their function, and it’s doing so every one second. These two nodes (Add and Hold Value) work together to utilize a feedback loop to count upward. And this node (Display Console Window) creates this blank white window and displays upon it the information that it receives.
Cool, all right, let’s go ahead and stop it (click “Stop”). Now let’s delete it (the whole composition), and build it together. You can come at this, or any, composition from any angle; for this composition I’m going to start with timing. The first node I’m going to choose is Fire Periodically; I’ll drag and drop that here (onto canvas). The function of Fire Periodically is to set things in motion, and it does this by triggering events. Events are fired outward from this (“fired”) port. All an event is, is the message to: “do you job now.” So it triggers events and it tells the other nodes it’s linked to, when it’s time to perform their function. And we can set how often it triggers an event here (“seconds” port). Right now the default setting is 1 second. That’s perfect for us, if we wanted to, we could change that number. OK, so we’re setting things in motion every 1 second; the first thing we want to do is start to count, we want to originate the number 1.
The next node I’ll choose is Hold Value. You can see (in the node library), there’s a slew of options, and we’ll choose the one that says “integer” because we’ll be dealing with whole numbers. I’ll drag and drop that (Hold Value node) here (onto canvas). Hold Value performs multiple functions, and the first thing it’s going to do is allow us to establish our initial value of 1. So I’ll go ahead and double click (“initialValue” port) and enter a “1” here. And let’s go ahead and link these two together. So I have the event coming out of Fire Periodically and I’m going to drag and drop that (a cable) to the refresh port here (Hold Value node). I’ll just drag and drop and it automatically connects (cable from “fired” port to refresh port). And the way Hold Value is set up, is that when it receives an event here (refresh port), it makes a decision. It looks down to the “initialValue” port and the “newValue” port and it chooses one of these. If an event has ever occurred in “newValue” — so if an event has ever gone directly into the “newValue” port — Hold Value will always choose the value found here (“newValue” port). If an event has never occurred directly in “newValue”, it will always choose the value found in “initialValue”.
Cool, so for our first event coming through, Hold Value will choose the value of “1” (“initialValue” port). Hold Value will also perform some other functions that will allow the feedback loop to work for us, and we’ll get into those a little bit later. Alright, so we already have the number 1, we already have the beginning of our count. So the next thing we can think about is displaying that count on a window. So we want to create a blank window and send the “1” to it. The next node we’ll choose is Display Console Window. I’ll drag and drop that here (canvas).
Display Console window can perform several functions, and the one we’ll talk about for this tutorial is simply displaying information on a window. So it creates a blank white window and any information that it receives in this port (“lineToWrite”) is displayed upon it. So we’ll drag the chosen value of “1” for our first event, coming out of Hold Value and drop it on the “lineToWrite” port. You’ll notice this bar (says: “integer → text”) automatically pops up. That’s a type converter. And what’s happening is, Hold Value is currently communicating with integers, which are in a binary format that humans don’t read so well, so Display Console Window identifies this and converts the integers to text, which humans read a little more easily.
Alright, so as of right now, every one second we’re sending an event (from Fire Periodically) to Hold Value, and Hold Value will consistently choose the value of “1” since an event has never occurred in “newValue”. And it’s going to send that “1” onto the window to be displayed. So let’s go ahead and run our composition as-is and see what happens (click “Run”). There’s blank white window, and we’re printing “1” every one second. Perfect. So let’s stop that (click “Stop”). And now let’s work on counting upward. So the next node we’ll choose is Add. We’ll choose the “integer” Add node, and drag and drop that here.
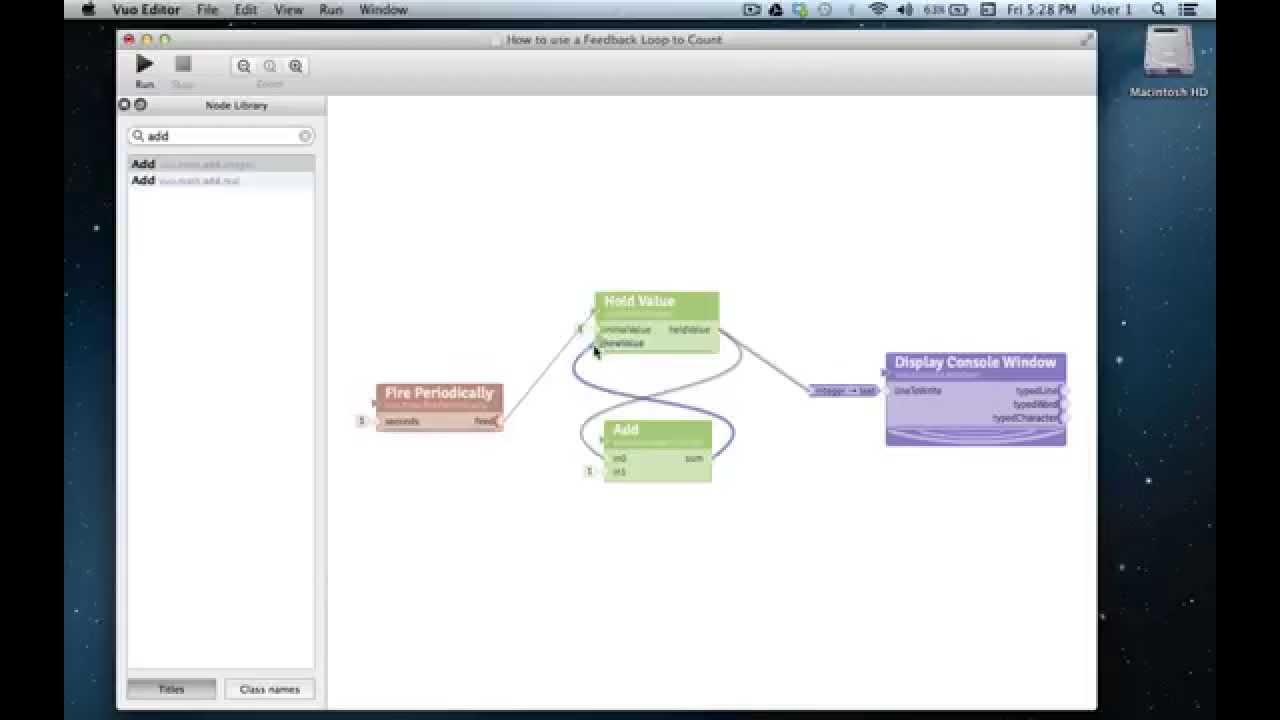
We want to take that initial value of “1,” and in addition to sending it to the window to be displayed, we want to take it and start preparing for our next event, we want to start counting upward, we want to turn that “1” into a “2.” So we’ll drag and drop that (the event coming out of the “heldValue” port) into the “in0” port of the Add node. The way the Add node is set up is really simple; it takes the values found in the “in0” port and “in1” port and it adds them together and then it outputs the sum here (“sum” port). So if we enter in a “1” here (“in1” port), Add will take the initial value of “1” (coming into the “in0” port), add it to this “1” (value at the “in1” port) and send the sum of “2” out this port (“sum”). So we’ll take the value of “2” and bring that around to the “newValue” input port.
Cool. So now that we’ve connected all our pieces, let’s go ahead and pause and give this composition some color. Let’s give Fire Periodically orange. I’m just right-clicking (to get color options). We’ll tint the nodes that are relative to our count (Hold Value and Add) green. And we’ll give our display, violet.
Great, so back to our composition. You may be thinking: “Wait, if you bring the value of '2 to ‘newValue’ (an event is still traveling with the information of the value ‘2’) wouldn’t Hold Value immediately choose the value of ‘2’ and send that out the output port to the window to be displayed and at the same time down to the Add node to become ‘3?’ Wouldn’t that ‘3’ come up, wouldn’t that endlessly cycle, or wouldn’t that feed back?”
Here’s where some of the other functions of Hold Value come into place. You’ll notice these curved bars on the back of the input ports (Hold Value node). Those are event walls. Those perform a key function for this composition right here. So when that “2” comes into here (“newValue” port) that event wall blocks the event from traveling any further, it stops the event and it stops the information, and it holds the information and it remembers the value of “2” here (“newValue” port). So that initial value of “2” will stop here (“newValue” port) and be held or remembered and nothing will happen until another event comes into the refresh port here (Hold Value node).
OK. Cool. So let’s walk through a few events from beginning to end and try to get a feel for how this composition flows. So, in our first second, an event will be fired out from Fire periodically and will go to Hold Value. Hold Value will choose between the initial value of “1” and the new value. Since an event has never occurred in “newValue”, Hold Value will choose the value of “1” (present at the “initialValue” port). It’ll send that “1” to the window to be displayed; at the same time it’ll send that “1” down to the Add node where “1” (from the “in1” port) will be added. It will become “2,” the value of “2” will travel up to the “newValue” port, it will stop here, and value of “2” will be remembered. In the next second, Fire Periodically will trigger an event to Hold Value. Hold Value will look between the initial value of “1” and the new value; the value of “2” is stored here (“newValue” port), and since an event has occurred, Hold value will choose the number “2,” and send that “2” onto the window to be displayed. At the same time it will travel down to the Add node, it’ll add “1” to the value of “2” and become “3,” and the value of “3” will travel up to “newValue” and stop here and be remembered. And we’ll walk through one more event, just to make sure we’re on track; we’ll do it a little more quickly. So Fire Periodically will generate an event, on to Hold Value, Hold Value will choose the remembered value of “3.” The value of “3” will go on to the window to be displayed and will also go down to the Add node, become “4,” and the “4” will come up to “newValue” and stop here until the next event. And we’re counting. Great!
So lets go ahead and run this composition and make sure it works. Great, so here’s our blank white window, created by Display Console Window. Then every one second an event is triggered (by Fire Periodically) and our feedback loop (between Hold Value and Add) is counting upward for us. Perfect! And then, for good measure, we can interact with our composition in real time if we’d like. So now, as this is running, we just changed it (the value at “in1”) so that we’re counting upward by fives. Cool. All right, that’s it.
Thanks so much for checking out Vuo. If you’d like to learn more about Vuo development or our plans for Vuo, you can check out vuo.org. And we hope that you’ll consider becoming part of the Vuo community, and supporting Vuo by purchasing a subscription. All right, we hope the tutorial was helpful and thanks again for checking out Vuo.

